
In this article we will create our own Magento 2 theme. We will build it, according to the following plan:
- Creation of the theme catalog and its declaration
- Creation of the composer package for theme (optional step). We will not do that in this article, but describe the process.
- Creation of the registration.php file
- Images configuration (catalog, product page, etc.)
- Internationalization and translation
- Creation of the catalog for static files
- Defining of the theme logotype
Creation of the theme catalog
In the previous articles, we described that the Magento 2 fronted structure has undergone dramatic change. Now the whole theme (including templates, layouts, css, js) is located in the: app/design/frontend/
Let's go to this folder and create the Vendor folder: /app/design/frontend/<Vendor>
For example: /app/design/frontend/Astrio
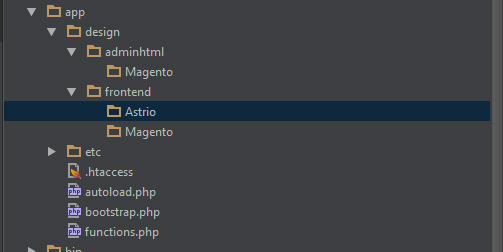
Note: As you can see, the folder name is capitalized. It is not a requirement, just a recommendation from Magento 2 developers.
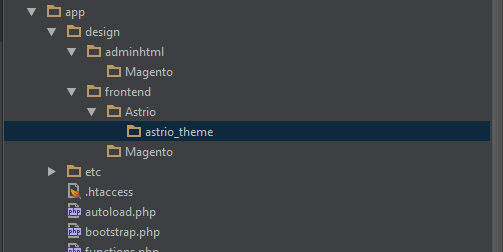
Next, let's create a theme folder: /app/design/frontend/<Vendor>/<theme>
For example: /app/design/frontend/Astrio/astrio_theme
Declaration of the theme catalog
After creating of the theme catalog, we need to create the theme.xml file. In this file, we will enter the name of our theme, the parent theme, also we can set the path to the theme preview image.
<theme xmlns:xsi="http: //www.w3.org/2001/XMLSchema-instance" xsi:noNamespaceSchemaLocation="urn:magento:framework:Config/etc/theme.xsd">
    <title>Astrio theme</title> <!-- theme name -->
    <parent>Magento/luma</parent> <!-- parent theme -->
    <media>
        <preview_image>media/preview.jpg</preview_image> <!-- theme preview image -->
    </media>
</theme>
Creation of the composer package for theme (optional step)
The default Magento 2 themes are formed as Composer packages. You can find more information about composer here and also here.
To organize your theme as a package, add the composer.json file to the theme directory and register the package on the server. The public package server by default is: https://packagist.org/.
The composer.json file provides information about the theme dependencies.
Example of the composer.json file:
{
    "name": "astrio/astrio-theme",
    "description": "test theme",
    "require": {
        "php": "~5.5.0|~5.6.0|~7.0.0",
        "magento/theme-frontend-luma": "100.0.*",
        "magento/framework": "100.0.*"
    },
    "type": "magento2-theme",
    "version": "100.0.1",
    "license": [
        "OSL-3.0",
        "AFL-3.0"
    ],
    "autoload": {
        "files": [
            "registration.php"
        ]
    }
}
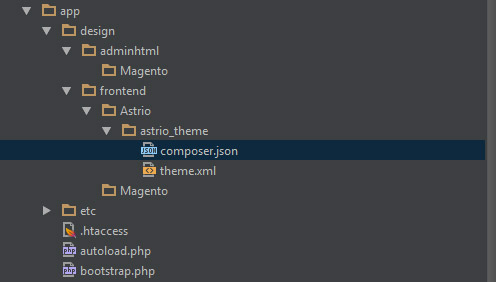
Here is what we have at the moment:
Creation of the registration.php file
In order to register the theme in the system, you must create the registration.php file in the theme folder, with the following content:
<?php

\Magento\Framework\Component\ComponentRegistrar::register(
    \Magento\Framework\Component\ComponentRegistrar::THEME,
    'frontend/<Vendor>/<theme>',
    __DIR__
);
In our case it will be:
<?php

\Magento\Framework\Component\ComponentRegistrar::register(
    \Magento\Framework\Component\ComponentRegistrar::THEME,
    'frontend/Astrio/astrio_theme,
    __DIR__
);
Images configuration
It is very nice and useful feature of the new Magento 2.0 version. In order to set the configuration (size, resize, proportions, cropping and so on) for the product images, we need to create the view.xml file, in the "etc" folder (in the root of the theme directory).
If the configuration of the parent theme does not require any changes, in this case the default view.xml file will be called.
In our case, we will inherit the theme from the standard Luma theme, and we will not touch the configuration of the images.
Internationalization and translation
In the Magento 1.9.x version, the CSV files with translations stored in the theme directory. To be more specific the translate.csv file with translation entries, stored in the "locale" folder, inside language folder, e.g. "ru_RU" or "en_US" folders, this way: <theme folder>/locale/en_US/translate.csv
The Magento 2 approach is a bit different. Now, at the root of the theme directory, you should create folder with name "i18n". And create a file with translation in the "i18n" folder, e.g. "en_US.csv".
Note: The "i18n" term is numeronym (where 18 stands for the number of letters between the first "i" and the last "n" in the word "internationalization").
Example: <theme folder>/i18n/en_US.csv
Creation of the catalog for static files
In order to store the static theme files (e.g. CSS style files, images, fonts or JavaScript files), you should create the "web" folder in the theme root directory, with the following directories inside: "css/source", "fonts", "images" and "js".
app/design/<area>/<Vendor>/<theme>/
├── web/
│ ├── css/
│ │ ├── source/
│ ├── fonts/
│ ├── images/
│ ├── js/
In our case it is:
app/design/frontend/Astrio/astrio-theme/
├── web/
│ ├── css/
│ │ ├── source/
│ ├── fonts/
│ ├── images/
│ ├── js/
Note: The "web" folder (located in the root of the theme directory) used to store theme static files. If you need to connect a file for some specific module, you should create a module directory in the theme folder and create there a "web" folder with the structure described above.
Example: /<theme>/<Namespace_Module>/web/
Magento 2 has a new organization structure, where there is a clear separation between module files and theme files. It is very convenient and we will return to this topic for a more detailed study later.
Defining of the theme logotype
By default in Magento 2 the logotype "logo.svg" is located in the <theme_dir>/web/images.
The default logo format is SVG.
In order to use your logo, you should:
1 - If your logo in SVG file format:
Rename it to logo.svg and place it to the <theme_dir> /web/images
2 - If your logo in some different file format, you need to define it:
To define the logo, you need to add the file to the <theme>/Magento_Theme/layout/default.xml
Note: In this case, we extend the layout of the parent theme. The Magento 2 layouts can be overrided and extended. We will describe it in more details in the next articles.
Next, you need to register information about the logo in the layout. For example, the astrio.png logo (with 150x30 size) will be defined as follows:
<page xmlns:xsi="http: //www.w3.org/2001/XMLSchema-instance" xsi:noNamespaceSchemaLocation="urn:magento:framework:View/Layout/etc/page_configuration.xsd">
    <body>
        <referenceBlock name="logo">
            <arguments>
                <argument name="logo_file" xsi:type="string">images/astrio.png</argument>
                <argument name="logo_img_width" xsi:type="number">150</argument>
                <argument name="logo_img_height" xsi:type="number">30</argument>
            </arguments>
        </referenceBlock>
    </body>
</page>
Conclusion
The process of the theme creation is finished. Here is the structure we build:

Next, you need to go to the admin panel, activate the theme and clean the cache. Note that there will be no changes in the store fronted after the theme activation, since we fully inherit the standard Luma theme.
In the next article we will talk about multiple inheritance in Magento 2, and describe the layouts "extend / override" mechanism.